.

Saturday, December 18, 2010

homemade notepads

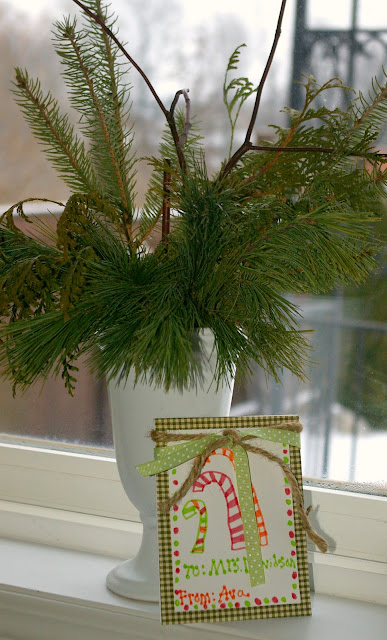
The kids wanted to make their teachers a little gift this year.  So I searched online for something that was practical, affordable and meaningful....homemade personalized notepads

I'm not sure what's been going through my mind lately, but I've gotten some really cool ideas from other blogs and have completely forgotten to jot down the actual site...so please if you've seen this around, let me know so that I can give credit where credit is due!

And I also realize this is coming to you AFTER school is out for the holidays...but the kids now want to make some for their friends too...BEST FRIENDS A & L etc....get creative and personalize it how you'd like! 

Here we go:

1. Find a font {for the teachers...mine is Life Lessons from DaFont}.

2. In WordPerfect, I typed "A note from Mrs. Teacher" and fit it 4 times to one sheet of regular printer paper.  I printed this out 5 times all together to make the notepad 20 pages. 

3. Fold the paper perfectly in half one way, open and fold in half the other way.  I made tiny pencil marks on the end of each fold to line up on my cutter. 

4. Place folded sheet on top of all your pages and carefully use your cutter to divide the paper into 4 equal pieces that will make up the notepad.                      


5. I had pretty cardstock from my "wannabe scrapbooking" days, so I also cut a front and back to make the notepad a little sturdier.


6. Next, assemble your notepad together. Use butterfly clips to keep everything together for glueing...oh and VERY IMPORTANT...be sure to use a piece of scrap paper {mine are old recipe cards} on either side so as not to get glue on your finished booklet.


7. Once your booklet is secured, apply Rubber Cement {Michaels $5}  across the top.  The scrap paper will allow you to not worry about any overglueing mess.  Apply a few coats, allowing for drying time in between.

8. Lastly, the kids were each given a white piece of cardstock cut out slightly smaller than the front cover to make their title page.  Use mounting adhesives, or double sided tape to stick title page onto finished notepad.  


I thought they turned out really sweet!  and I was very surprised how easy it was to use the rubber cement.  I just hope they hold up and don't fall apart! : )


I was just thinking...maybe I should make one up for my husband to take to work and have it read "Stacey rocks my world" hahhaha! 

enjoy your holidays


Thursday, December 16, 2010

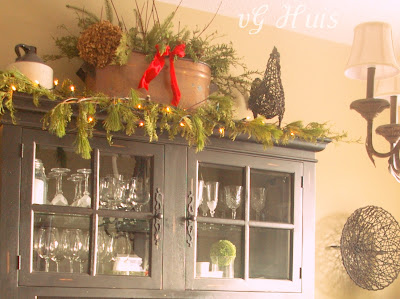
christmas around the vG Huis

Good Grief Linus!  My indoor camera skills are definately lacking!  Alas my Christmas home tour is a little on the sad side, hmmm and fairly late as well.  Nonetheless, I wish you a very Merry Christmas from Our House to Yours.


On Christmas Eve, these minature stockings are home to the kids' letters to Santa.


photo: vG House Winter 2009

HELP!!  I've got a favour to ask....this spring we are replacing the woodwork on the front of the house.  I'm thinking about changing from the terra cotta colour....any suggestions???  and garage, front door and pillar colours too?!!  I know it's early to think about this...but I flip flop sooo much with colour choices, I need ample time to really make a decision I won't regret and I would really appreciate your thoughts.

I've added this post to the Nester's Christmas Tour of Homes.

Keep Warm &Cozy over the Holidays
Enjoy your families... squeeze 'em, kiss 'em and luv 'em up!


Wednesday, December 15, 2010

thimble cookies + candy cane martinis = mmmmmm

The most magical day of the year is fast approaching.  I've been busy taste testing many yummy mommy drinks...that was meant to read yummy drinks that are mommy drinks...but yummy mommy works for me too ; )  and while I'm boozing it up...I'm sneaking in a HO lotta cookie tasting too.  Today I'm sharing my favourite family Christmas tradition Thimble cookie recipe, as well as a newly adopted martini recipe...Candy Cane!  YUM!

This recipe is foolproof and seriously couldn't be any easier to make.  My kids aged 4, 7 and 8 actually baked the ones in the above photo.

Thimble Cookie Recipe
1 cup butter (room temp)
1/2 cup brown sugar
2 egg yolks
2 cups flour
strawberry jam {my husband, Martin Stewart, makes our homemade strawberry jam}
{for those of you who don't like jam, substitute chocolate chips, hershey's kiss, or m&m's}


Cream first 3 ingredients.  Using a mixer, gradually mix in flour, this will give you a crumbly dough. Then by hand, knead dough until a playdough consistency.  Roll into small balls {about half the size of a regular cookie ball}.  Press centre with thumb and spoon in homemade strawberry jam.


Bake at 350 for about 10-15 min depending on your oven and the size of your cookie.


Candy Cane Martini
I found this recipe {of course I can't remember where from} while in search for a new drinky poo for my cougars girlfriends at my recently passed annual Girls Christmas Party.  I'm pretty sure it was a yummy success!

Candy Cane Martini Recipe

1 ounce Godiva white chocolate liquer
3/4 ounce Vodka
1/2 ounce peppermint schnapps

What to do with left over party alcohol...
Why put it in your coffee of course!  I was actually trying to remake a version of Starbucks Christmas coffee and it was perfect.

Coffee as per usual fixings {I'm a double double kinda gal}
1 ounce of peppermint schnapps
top with real whipped cream, chocolate shavings optional
garnish with candy cane

I'm telling you this is definately good to the last drop! Yum Yum and Yum!

Merry Christmas to All

Thursday, November 11, 2010

bathroom talk

Good day ladies, for those of you who are following along with me, you know I'm attempting a little bathroom makeover. However, I have a problem. See, I like to start things and if they don't get finished in around the first 2 days...I wanna move on??? and then nothing gets done. I've tried...I'm trying to stay focused. I have to remind myself that I am working on one project and stay away from thinking about what you would like to do in other rooms. Does anyone else have my problem? urgh.

Keeping on track, today I painted the last coat of paint on my bathroom cabinet doors, so they will go up soon. ( I really wanted to start painting Ava's room today) but Yay, the cabinets look seriously good considering I painted them myself : ). Now I have to look up all that I can about taking tile down off my walls that are surrounding my tub. I want to be totally prepared when I bring this up for the last time with Mr. vG {aka Party Pooper}. I love him to bits and he's cute as sin...but we agree to disagree. So I have gain my ammunition....please if any of you out there in blogland have beadboard around your tub you need to let me know everything there is to know!

Again here is the surround panelling I'm after:

My renos will take a long while yet, so in the meantime, more amazing bathrooms...


I've just noticed that almost all of my inpsirational bathroom photos has an old fashioned tub...yeah, I told Mr. vG that was one of my dreams...he said I'd better get some sleep???   Guess that means no? 


Sunday, November 7, 2010

editing pictures

Only a few short weeks ago, my computer editing program decided it didn't want to work for me anymore...am I really that demanding???  Anyhow, I am sucky at picture taking and really need all the help I can get!  So I searched for a free online site to help out my sad photos.

I am now experimenting with Picnik! and so far I ♥ IT!  There are soooo many great FREE options, but you can definately make the move to upgrade if you so choose.  I have used this on many of my personal family photos as well, and with wonderful results. 

Here is a quick sample of some editing....

 Original photo : (
{that big hunk of burlap there was just to protect my wall from the chalkboard until I hang it}

 crop, exposure and colour play

collages and round borders
{my new header picture}

Picnik lets you do a very wide range of fun editing....from giving yourself a tan and removing wrinkles {uh yes please} to creating a variety of collages, adding text and much much more.  If you are unhappy with your picture results, head on over to Picnik...but I suggest bringing a snack, you just might have a little too much fun  : )

Wednesday, November 3, 2010

Christmas in the bedroom

 In no way, shape or form have I started to decorate for Christmas yet...uhhh I still have pumpkins in my header.  Yes, I love the Christmas season as much as the next guy, but my treasured holiday cheer doesn't come out until December 1st. 

When I was PB browsing today, I took special notice to these bedrooms. I've never decorated my bedroom for Christmas before...but doesn't the plaid duvet just give you the warm fuzzies?  I think I may have to reconsider Christmas in the bedroom (subtle of course...don't want no ceramic Santa's staring me down or anything.)

Peaceful in Plaid

 Holly Jolly


I love the Noel lettering in the picture above...or try making your own signs this year ~ using some festive wording such as:

Noel   Merry   Give   Gift   Joy   Peace   Spirit    Saint Nicolas   Jolly   Cheer   Mistletoe  Yuletide    St. Nick

or use them all to make a Festive Subway Art Piece!


 How sweet are the kids rooms all decked out! Show me some framed mitten love.

One month left, 51 sleeps to Go 

Monday, November 1, 2010

trick or treat

What??? It's over already?  I can't believe Halloween has come and gone! 

Meet the vG's.... the baby dragon, the cross eyed cop and the big nerd!

Can't forget Mr. vG and...

Oh yes it's me...pits and all!  And a special thanks to little miss Maya for giving me her sticky mustache to be used for my underarm decor : )

The cave people costumes were for an adult halloween party.  We made the costumes, but I really didn't get enough fabric..huh hmmm hence why I stretched {or should I say shortened} it a little.  (I am wearing a brown bathing suit underneath : )  The necklaces are from a rib dinner graciously hosted by my sister a couple of months ago.  I dried them out and Mr. vG drilled holes to string.  What a fantastic weekend!  Another special thanks to Lady Gaga for hosting the adult party : )

Hope you all enjoyed your Halloween! 

I've linked this post to the trick or treat party at Cottage and Vine : )

Friday, October 29, 2010

Jaime Coyle Photography

Babies are the world's most precious of teeny creatures.  They have the ability to make even the coldest heart thump warmth, the power to make a grown woman weep with overwhelming emotion and ensure, at the very least, a smile from random strangers.  

   "A new baby is like the beginning of all things, hope, a dream of possibilities."

"When you become a mother, you stop being the picture and start being the frame."


Pure

Sweet 

Angels


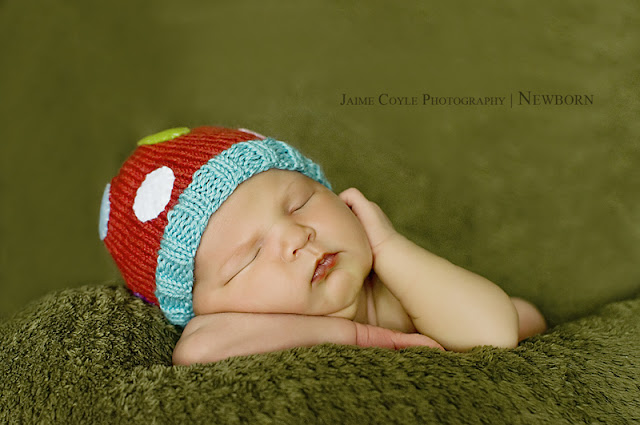
Time for bragging rights....meet Jack.  He's my new little nephew.  Isn't he just a little peanut for sure???  Oh and the teeny tiny toes poking out just melts my heart.


Aren't these photos fabulous? They were taken by a very talented photographer and family friend, Jaime, of Jaime Coyle Photography.  She magnificently captures the very essence of newborns with such grace. Her photos bring me sooo much joy. I can only imagine how happy the parents must be to have these beautiful portraits of their little ones...what an amazing gift, a timeless treasure.

Not only is she an amazing photographer, but she knits all her props too! From the booties~ to the hats ~to the little peanut knits...this is all hand crafted by none other than Jaime herself.  She is a brand new mommy too! and while she was on bedrest...she knit and knit and knit like no tomorrow  until she was "buried in hats" and decided to start selling them on her blog, Life Through a Lens .

Jaime came out to do some photos of my family two years ago to help start up her website...she definatley worked her magic on me in this one : ) She is such a blast to work with. Check out her entire photo gallery and other information.


Have a Safe & Happy Halloween! : )