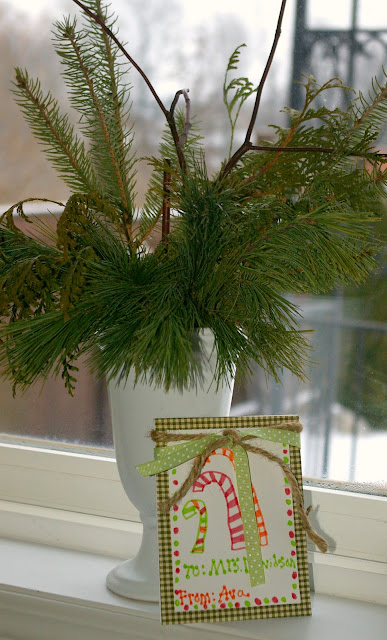
I'm not sure what's been going through my mind lately, but I've gotten some really cool ideas from other blogs and have completely forgotten to jot down the actual site...so please if you've seen this around, let me know so that I can give credit where credit is due!
And I also realize this is coming to you AFTER school is out for the holidays...but the kids now want to make some for their friends too...BEST FRIENDS A & L etc....get creative and personalize it how you'd like!
Here we go:
1. Find a font {for the teachers...mine is Life Lessons from DaFont}.
2. In WordPerfect, I typed "A note from Mrs. Teacher" and fit it 4 times to one sheet of regular printer paper. I printed this out 5 times all together to make the notepad 20 pages.
3. Fold the paper perfectly in half one way, open and fold in half the other way. I made tiny pencil marks on the end of each fold to line up on my cutter.
4. Place folded sheet on top of all your pages and carefully use your cutter to divide the paper into 4 equal pieces that will make up the notepad.

5. I had pretty cardstock from my "wannabe scrapbooking" days, so I also cut a front and back to make the notepad a little sturdier.

6. Next, assemble your notepad together. Use butterfly clips to keep everything together for glueing...oh and VERY IMPORTANT...be sure to use a piece of scrap paper {mine are old recipe cards} on either side so as not to get glue on your finished booklet.
7. Once your booklet is secured, apply Rubber Cement {Michaels $5} across the top. The scrap paper will allow you to not worry about any overglueing mess. Apply a few coats, allowing for drying time in between.
8. Lastly, the kids were each given a white piece of cardstock cut out slightly smaller than the front cover to make their title page. Use mounting adhesives, or double sided tape to stick title page onto finished notepad.
I thought they turned out really sweet! and I was very surprised how easy it was to use the rubber cement. I just hope they hold up and don't fall apart! : )
I was just thinking...maybe I should make one up for my husband to take to work and have it read "Stacey rocks my world" hahhaha!
enjoy your holidays


Those are adorable!! What a great idea and I love that they are handmade! I totally think you should make for you hubby that says that!!! :)
ReplyDeleteHi! I absolutely love your blog! As a thank you for sharing your creativity, ideas and passion, I want to give you the Stylish Blog Award...
ReplyDeleteStylish Blogger Award Rules for accepting this award are:
1. Thank & link back to the person who awarded you this.
2. Share 7 things about yourself.
3. Pay it forward to 15 recently discovered great bloggers.
4. Contact those bloggers and tell them about their Blog Award!
You can get the award off of my post, just save it as a pic: http://erinmccall.blogspot.com Merry Christmas
Great idea, so much cuter than the ones we made back in the day!
ReplyDeleteLove this idea. I'd like to make some for friends and with my class next year. So much learning for kids. Fiona
ReplyDeleteWhat a great gift, so much better than a bought gift.
ReplyDeleteHappy New year.
XX
wow! these are AHMAZING!! what a great project and even better gift!
ReplyDeleteYou know what would be cool Stace? Making those into ORNAMENTS that could then be used as the notepads when they come off the tree!
ReplyDelete(Yeah, I'm about 3 months late on this one...sorry!)
"Tim tells me he ran into a roadblock with attorneys from the Department of Human Services, who have been hesitant to supply the data."
ReplyDeleteHere is my web site: weight loss pills for men over the counter