.

Sunday, March 27, 2011

coffee filter lamp shade

There once was a lampshade that could. 
Then one day the lampshade just couldn't anymore. 
Until now....

Honestly?!  Coffee filters..who knew?
I would love to take credit for this amazing diy project..but while clickety click clicking away from one crazy talented blogger to another to another and another...I found the most gorgeous lampshade made of coffee filters that was crafted by Sarah at Northwest Hospitality. 

Hmmmm a coffee filter lampshade...how very interestingly beautiful....and I  HAVE ALL THE SUPPLIES ON HAND!  My shade wasn't a drum, like Sarah's, but I decided I had nothing to lose..and the coffee filter extravaganza began.

What you need:
lampshade
hot glue
coffee filters (bulk from Costco)
wine for the friend who gets suckered into folding : ) {thanks 'C'}

1.  fold coffee filter in half
2.  fold in half again
3.  fold in half again
4.  fold point up and add a spot of hot glue
Continue this process and glue folded filters to lampshade until full.

I would like to add that this process really DOUBLES the size of your shade.  I had started out with the lamp below... 


and when the shade was completed...the size no longer looked appropriate on it's base.  Luckily I had another lamp in the house that I swapped out the base for.  I gave it a quick paint job and some distressing and am super happy with the results.

It really does give all the most wondrous glow at night.    I have another lampshade to revamp in Ava's room.  But this time I'm going to try ruffles.  Wanna see what I mean?  Take a stroll on over to see a gal by the name of Jennifer from Dear Lillie...but be forewarned..have a potty break first because you WILL be there for a very very very long time!  Seriously this chicky has more talent in her baby finger than I could ever dream of.

Also, if you would like a much more detailed tutorial on the coffee filter lampshade and many more inspiring ideas...please visit Northwest Hospitality.


Have a great week everyone!


Thursday, March 17, 2011

Going Green

In the spirit of today, St. Patrick's Day...
a little green goes a long way.


Picture sources: Suziebeezie, House Beautiful, Eclectic Reinvented, Martha Stewart, Cupcakes Take the Cake

Happy St. Patrick's Day!!


Sunday, March 13, 2011

a touch of spring...


Since Mother Nature
is NOT listening to me, I thought I'd bring a little spring
inside the house, starting with the family room. 

My mantel was feeling a little drab.  With a $0 budget and an
urge to create something otta nothin'...
around the house I went, robbing a little from here and there.

I pulled out a picture frame that I've been hiding
under the couch, and printed "Spring".  Pretty original huh?
  I wanted the sign to read simple and clean, so Spring it is.

The bird's nest is real. 
Mr. vG and the kidlets brought it in during the winter.

Old milk bottles filled with white navy beans make for a sweet candle holder. 
The other candles shown are sitting on a pair of silver candle sticks turned upside down.


Twine can be very effective for decorating on the cheap.

 The curtain tie backs can be made to your desired size or thickness.
I simply cut 9 equal lengths of twine, and with 3 groups of 3, made one main braid.


Mr. vG always complains about too many pillows in HIS movie room...
so they've been adopted by the family room where they will be well loved!

The turquoise and green pillows together make a cheerful combination.

Speaking of pillows...
before Christmas, I won a giveaway and started a post
but completely forgot about it!!!  What a smuck I am! 

I won a sweet ring and this beautiful "keep calm" pillow by Little Miss Momma
 from a Tatertots & Jello giveaway!  These are seriously 2 of the SWEETEST girls
I've ever had the pleasure of sorta knowing : )  Check out their awesome blogs for
many many many crazy good ideas!

Spring I really miss you...please come soon.

Happy March Break


 I've linked this post up to: My Uncommon Slice of Surburbia , A Beach Cottage


Saturday, March 5, 2011

hallway love

Oh hey!  I know I know it's been awhile...a LONG while {shame shame no excuses here}.  And you're probably thinking...all this time, months really, and all she's got are hallways? 

Well sir, do I love halls?  Halls to me are very important yet sometimes overlooked spaces.  They lead you and set the feel for what is to come...like an invitation...come follow me.

The April issue of Style at Home magazine did a piece on designer Amanda Nisbet which included this fabulous hallway above.  Just look at all the amazing detail in this space!  Let me count the ways...the arches, the orb & sconce lighting, the sisal rugs, the panelling and linen wallpaper...all come together with stunning perfection.

More arches.  I think I just may have a new obsession to add to my very long list.

MMmmmmm mmm, if I could eat it I would.  This hallway makes me smile with all it's sunshiney brightness.  Makes me wanna take my closet door off...if only I had such beautiful blankies to display.  And those lights!
 Planked ceiling and built ins provide mucho cozy for this pass thru.

Destiny, from A Place for Us, tranformed her cookie cutter hallway with the simple addition of homemade signs.  Love this look?  Destiny gives a wonderful tutorial here.

Not quite the hall hallway, but I had to sneak in another arch : )

Happy Weekend All!


Saturday, December 18, 2010

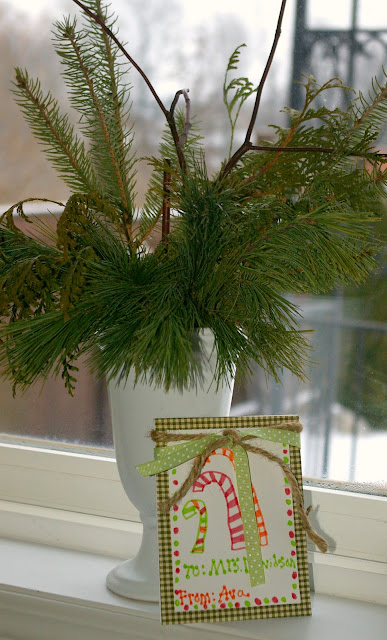
homemade notepads

The kids wanted to make their teachers a little gift this year.  So I searched online for something that was practical, affordable and meaningful....homemade personalized notepads

I'm not sure what's been going through my mind lately, but I've gotten some really cool ideas from other blogs and have completely forgotten to jot down the actual site...so please if you've seen this around, let me know so that I can give credit where credit is due!

And I also realize this is coming to you AFTER school is out for the holidays...but the kids now want to make some for their friends too...BEST FRIENDS A & L etc....get creative and personalize it how you'd like! 

Here we go:

1. Find a font {for the teachers...mine is Life Lessons from DaFont}.

2. In WordPerfect, I typed "A note from Mrs. Teacher" and fit it 4 times to one sheet of regular printer paper.  I printed this out 5 times all together to make the notepad 20 pages. 

3. Fold the paper perfectly in half one way, open and fold in half the other way.  I made tiny pencil marks on the end of each fold to line up on my cutter. 

4. Place folded sheet on top of all your pages and carefully use your cutter to divide the paper into 4 equal pieces that will make up the notepad.                      


5. I had pretty cardstock from my "wannabe scrapbooking" days, so I also cut a front and back to make the notepad a little sturdier.


6. Next, assemble your notepad together. Use butterfly clips to keep everything together for glueing...oh and VERY IMPORTANT...be sure to use a piece of scrap paper {mine are old recipe cards} on either side so as not to get glue on your finished booklet.


7. Once your booklet is secured, apply Rubber Cement {Michaels $5}  across the top.  The scrap paper will allow you to not worry about any overglueing mess.  Apply a few coats, allowing for drying time in between.

8. Lastly, the kids were each given a white piece of cardstock cut out slightly smaller than the front cover to make their title page.  Use mounting adhesives, or double sided tape to stick title page onto finished notepad.  


I thought they turned out really sweet!  and I was very surprised how easy it was to use the rubber cement.  I just hope they hold up and don't fall apart! : )


I was just thinking...maybe I should make one up for my husband to take to work and have it read "Stacey rocks my world" hahhaha! 

enjoy your holidays


Thursday, December 16, 2010

christmas around the vG Huis

Good Grief Linus!  My indoor camera skills are definately lacking!  Alas my Christmas home tour is a little on the sad side, hmmm and fairly late as well.  Nonetheless, I wish you a very Merry Christmas from Our House to Yours.


On Christmas Eve, these minature stockings are home to the kids' letters to Santa.


photo: vG House Winter 2009

HELP!!  I've got a favour to ask....this spring we are replacing the woodwork on the front of the house.  I'm thinking about changing from the terra cotta colour....any suggestions???  and garage, front door and pillar colours too?!!  I know it's early to think about this...but I flip flop sooo much with colour choices, I need ample time to really make a decision I won't regret and I would really appreciate your thoughts.

I've added this post to the Nester's Christmas Tour of Homes.

Keep Warm &Cozy over the Holidays
Enjoy your families... squeeze 'em, kiss 'em and luv 'em up!