.

Friday, October 29, 2010

Jaime Coyle Photography

Babies are the world's most precious of teeny creatures.  They have the ability to make even the coldest heart thump warmth, the power to make a grown woman weep with overwhelming emotion and ensure, at the very least, a smile from random strangers.  

   "A new baby is like the beginning of all things, hope, a dream of possibilities."

"When you become a mother, you stop being the picture and start being the frame."


Pure

Sweet 

Angels


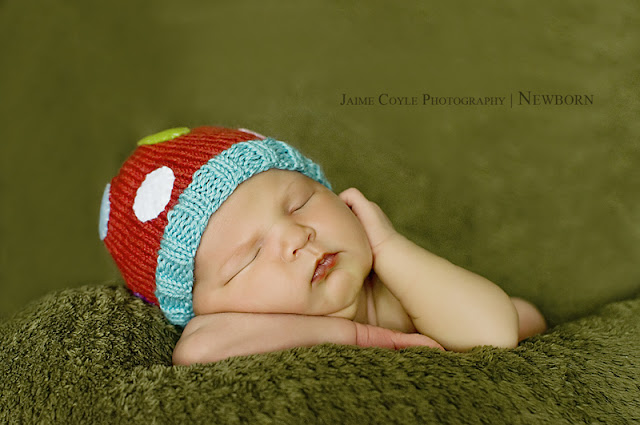
Time for bragging rights....meet Jack.  He's my new little nephew.  Isn't he just a little peanut for sure???  Oh and the teeny tiny toes poking out just melts my heart.


Aren't these photos fabulous? They were taken by a very talented photographer and family friend, Jaime, of Jaime Coyle Photography.  She magnificently captures the very essence of newborns with such grace. Her photos bring me sooo much joy. I can only imagine how happy the parents must be to have these beautiful portraits of their little ones...what an amazing gift, a timeless treasure.

Not only is she an amazing photographer, but she knits all her props too! From the booties~ to the hats ~to the little peanut knits...this is all hand crafted by none other than Jaime herself.  She is a brand new mommy too! and while she was on bedrest...she knit and knit and knit like no tomorrow  until she was "buried in hats" and decided to start selling them on her blog, Life Through a Lens .

Jaime came out to do some photos of my family two years ago to help start up her website...she definatley worked her magic on me in this one : ) She is such a blast to work with. Check out her entire photo gallery and other information.


Have a Safe & Happy Halloween! : )


Wednesday, October 27, 2010

just a little peek

I've got me a litte mason jar and wire basket love going on....bathroom reno going slowly but surely.


Tuesday, October 26, 2010

chanelling paneling...


Time and time again, I find myself drooling over rooms with paneling of any sort.  Wainscoting, beadboard, board and batten and other mouldings alike make me weak in the knees.  Something about it provides the perfect sense of cozy warmth.  A staple so to speak...kind of like your favourite pair of jeans.


I adore this picture. The painted paneling, those amazing old wood floors and don't even get me started on that built in book shelf... {sigh}

While you're at it, add it to the ceiling too!  Why should it be all lonely up there?

This entryway is stunning with the floor to ceiling detail.  I usually don't care for crown moulding and baseboard to be painted out with the wall, but here it seems to work beautifully.

Imagine these rooms without their decorative wall detail.  Sure they would still be nice rooms, but the paneling provides the perfect backdrop and commends that extra element of warmth and texture.


 And {sigh, sigh double sigh} beams are high on my wish list!  Again floor to ceiling paneling topped with beamy goodness.


 Horizontal placement is making a big stir these days....and for good reason...gorgeous!


Melaine from Sweet Savannah has added all the perfect touches to make this a most inviting family room.  I love every detail in this room, but of course, sing it with me now....paneling!!! 

The picture below is what I'm trying to talk my husband into doing around our soaker tub. Currently, it is surrounded with tile....it's the same tile that is on our floor, the wall around the tub and in front of the tub. Really it looks like someone threw up tile in my bathroom. Mr. vG doesn't like the idea of mixing wood with water...it's the man in him... I only see the beauty in it. What do you think? Anyone have paneling around their tub?

Some exciting news for me...a few days ago,  I got my Dash & Albert rug in from CSN.  It is amazing!  So amazing that I painted my bathroom 2 hours after the rug hit the floor.  The new wall paint only spurred me on more and I am now in the process of painting the cabinets and framing a mirror...let's all of us cross our fingers as tight as we can that I just might get some PANELING of some sort in my bathroom!!!  Pretty please with extra sugar!  More on this soon : )

Friday, October 22, 2010

the sign is up...

We  finally broke ground.  The post is up, the crow is perched and we are ready to host the night's deadliest affair.  If only it were that easy...

Mr. Raven was sitting in Shoppers Drug Mart (thank you to C's Ma) amongst 5 broken friends...so I really hope he holds up. 

I made the mistake of asking the oh not so cheerful lady at the counter for a bag for him...she looked at me like I was crazy, gave me a slight eyeroll, then huffed and said "well we charge 5 cents for that you know".  Nice...but no bother, my spirits are up...I've got my crow : ).  

With excitement high, I'm in the garage with a very heavy drill, the crow, and a giant spider in one hand and three sharp pointy screws in the other.  The phone rings while I'm about to move my bike so I can get to the ladder.  I put the phone in the crook of my neck.  The bike falls and is twisting my hand and the screws are also now digging into my palm.  Little screeching into the phone...  I get the bike settled, open my hand and drop all the screws...ahhhh feels good.  Still talking, I remove the ladder from it's place and it heads right for my right eye.  Urgh...how bout I hang up now?  can anything else go wrong? 

The wind was blowing and the air chilled.  But I have to share this with my bloggy friends, even though I always feel like a nerd taking pictures in front of my house...I wonder what the neighbours think, oh look there's that crazy Stacey out there again taking pictures, just what is she taking pictures of anyway and for what?? 

Anywho, I get inside with my hot chocolate to download my photos....what... NO CARD in my camera that whole time!  and now my photo editing software keeps saying there is an error and won't even let me open the program! 

I'M DONE!


I've linked this post to The DIY Show Off: Fall Festival

Monday, October 11, 2010

turkey for the little turkeys

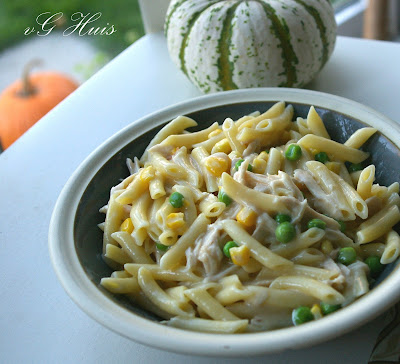
Happy Thanksgiving! So, if not today, I'm sure most of you (Canadians that is) had turkey at some point this weekend?  And do you have loads of leftovers and little ones who bore easily of a plate full of all the traditional fixings for days in a row??  I have two recipes that work wonders in my house for getting the kids and adults alike to gobble up.  Creamy Turkey Penne and Turkey Pot Pie. (of course these recipes can be substituted for chicken at any time)


Creamy (cheater) Turkey Penne

1 1/2 - 2 cups shredded turkey
1/2 cup fresh or frozen peas
1/2 cup fresh or frozen corn
1 can campbells cream of chicken soup
1/2 soup can of milk
s/p to taste
about 4 cups cooked penne pasta. (sorry I never measure, I usually leave half the pasta in the strainer and add more as I mix the sauce until I get the sauce coverage I like)

1.  Cook pasta till aldente. (while pasta is cooking, warm peas and corn in microwave)
2.  Drain and rinse pasta, put back in pot and stir in soup mix and 1/2 soup can of milk.  When combined add turkey and salt/pepper.
3.  Warm on low to desired heat.

PS pulled turkey always tastes better to me than cutting it with a knife??? don't know why, just is.

That was my cheater fast track recipe.  Now if you have a little more energy and time...give the pot pie a try mmmmmmm.


Turkey Pot Pie

The filling in this recipe is enough for 2 pies, but you have to make this crust recipe twice.  I once attempted to just double the dough recipe and it didn't work out so well.

CRUST
2 cups flour
1 tsp salt
3/4 cup room temp lard (tenderflake)
6 tbsp cold water
TIP:  do NOT over work this dough, even though I use flour on the counter it tends to stick.  Roll to desired size and it should lift nicely if worked around the underside with a spatula.

FILLING
1/2 cup butter
1/2 cup flour
1 tsp salt
2 tbsp onion
2 carrots, chopped
2 celery, chopped
2 small potatoes, diced small
3 cups broth (I hope you boiled your turkey bones)
3 cups turkey, shredded : )

Preheat oven to 400 degrees F

1.  In a large saucepan, melt butter, whisk in flour, s/p and onion to make a paste.
2.  Gradually stir in broth, sauce begins to thicken.
3.  Stir in veggies and pour into pie crust.
4.  Bake for 30-40 min or until crust is golden.  (I do mine 35 minutes on convection oven)

And a special THANKS to all my dear readers : )  I can't tell you enough how amazingly special it makes me feel that you visit!

Sunday, October 10, 2010

over the top pumpkins

I've been keeping a folder of pumpkin photos that I really love. I just couldn't edit any of them out...so there a quite a few pictures : ) Hope you enjoy them...

I love stacked pumpkins...but isn't this a great idea to carve out your house numbers?

Some people are just so very creative...what sweet little pumpkin owls using sunflower seeds for the ears, eyes and claws.


I love this whimsical look ... pumpkin hotel for mice is mighty nice.

How cool is this giant shadow up the stairs??? You could probably cut out the shadow using bristol board and tape it to your risers using double sided tape. Big impact on a budget I'd say!


I think this is about the coolest thing I've ever seen! Paint a shadow tree on your pumpkins, stack em up and voila....could it really be that easy???


I'm hoping to try this out this year...I think it'll look smashing beside my new Dead & Breakfast sign.


I never would have thought of putting a mask on a pumpkin...but I totally love it.
Hope you've enjoyed all these amazing ideas! These pictures and ideas came from Martha Stewart, Country Home, Country Living, Susiebeezie and Family Circle.


Saturday, October 9, 2010

halloween'n

Normally, I really don't decorate outside of the ordinary pumpkins, coloured fall leaves and mums for the fall season. But this year, I wanted to play a little with some halloween decorating for the kids sake, uh huh, for the kids. I bought these giant spiders from Dollarama and thought they'd look cool climbing up my mirrors and picture frames within the house. Their legs are bendy, so I bent one on each side and tucked them on either side of the frames and they stay nicely.

My favourite girl, Ava worked hard tracing and cutting out the bat templates from Country Living. Click here to see Country Living's bats....they did them outside with stiffened felt, which would be sooo cool too, but we kept our indoors and used black bristol board and hung them on the walls with double sided tape.

I finally finished my Dead & Breakfast sign!!! This idea came from Better Homes and Gardens...for tutorial go here. Also, check out one of my favourite blogs, My Sweet Savannah, the overly talented Melaine did her own version of this sign as well.

Sporting one beer with lime cordial and an assortment of power tools (not sure that's the best combo heheh) I ventured in the driveway with some old weathered decking boards and went to town making the sign. I was VERY nervous to paint the lettering on the sign, but a few days ago, when all was quiet in the house, I got out the graphite paper, paint and brushes and was very surprised at how easy it was....... soooo easy! Graphite paper rocks! Now all I have left to do is hang the vacancy sign with chain and put it up in the front yard.

Happy weekend, and Happy Thanksgiving : )

I've linked this post up with Funky Junk Interiors and Tatertots and Jello : ) and DIY Show Off.


Funky Junk's Sat Nite Special